Tel: 07879426788
Email: enquiries@meadowlark.co.uk
Part 2 Enhancing the database
The database you developed can be enhanced in a number of ways to make it more presentable and useful. The database in its current form is still usable, but generally we find that if something looks more agreeable, users will persevere with it, have patience with it, and make allowances for it. Lets look at what we can do.
Customising the database form to make it more presentable
Whilst your database is currently fully functional it might be a good idea to back it up. You can do this by simply copying all the Approach related files ( any file with an .apr extension, or a .dbf or .dbt extension if your are using a dBase style data store) to another part of the hard disk, the network, or a memory stick. While you are at it, make sure the date of this backup is recorded somwhere. You could even change the name of the apr file to reflect and record this date, ie you could name the apr file something like List-do20210121.apr, this includes the year and the date.
If the database is not currently running, start up the list/task database by double clicking on the list-do.apr file.
Click on the Design button at the top of the page. The form will change from Browse (data entry mode) to Design mode where changes can be made to the user interface. In design mode, you can clearly see a grid of dots overlaid over the grey background of the form. This grid can be useful to help you align objects on the form accurately.
Right click on the dull grey grid background upon which the fields are placed. Click on the Form properties option.
This permits changes to the background form. Changing the background colour is particularly easy. Click on the first tab to the left of Basics. Click on Fill colour and change the colour to anything but bleak grey. I have changed the background to something more subtle. Any light pastel colour might be a bit more cheerful than the currently selected dark grey. The lighter the colour the more it will contrast with the dark text we will use for the controls. If you should make a mistake at any point whilst you are customising the form an any other aspect of your Approach application, just shut down Approach by clicking on the little X in the top right of the window, and when you are asked if you want to save the Apr file, say no. If you then re-open the list-do.apr file with a double click, your unchanged form will be displayed again.
Changing the text fields of the database form
The text labels, above each text field / control are not very user friendly. Currently the names of the corresponding fields in the table are used by default, but there are better choices of text. The first label and control is the tTask control. Lets change this into something a bit more suitable. From our naming convention, we know what this field means, it is text and it hold task information
Whilst in Design mode, right click on the tTask label, you will notice that the control has a marquee: four black squares marking out the control you have selected. Click on the Field properties option
The little properties window that is now displayed has a series of small tabs at the top. The first tab is the AZ tab that allows you to change the appearance of the control's text. Make sure the Label radio button is selected then change the Label text to Task from tTask. Likewise change dStart to date start, dEnd to date end, and tComment to Comment.
Now double click on the title at the top of the form, it says Blank database and change it to something like List-do. Save the file by clicking on the File menu (top left) then Save Approach file. When all five field labels are changed you might end up with something like
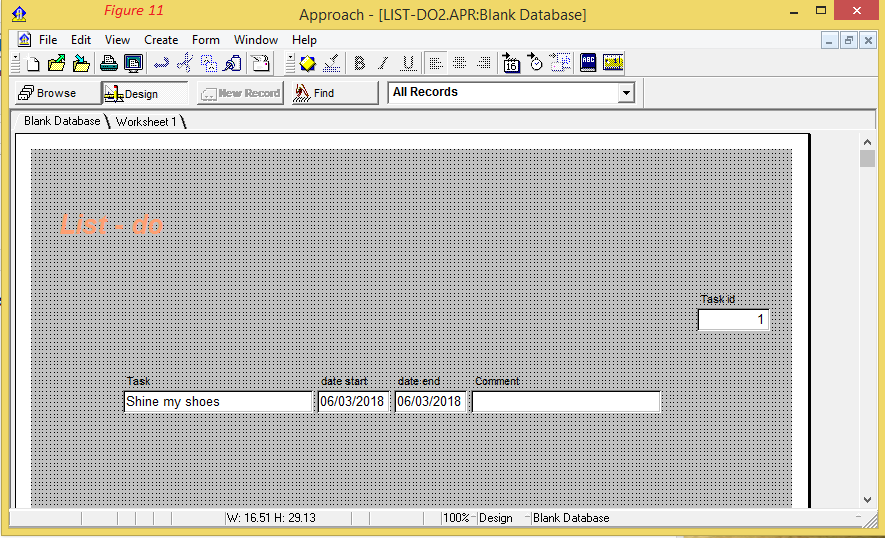 Figure 12.
Changing the appearance of the database forms
Customising the database form using styles
There are many ways we can change the appearance of the forms. Generally when writing software it is advisable to find a solution that requires the least work. This might sound lazy, but it actually makes lots of sense, as we will see later. Here is one way that might save a lot of time in the future. We are going to use Styles in Approach. We create a style for some aspect of the database, like a text box, ,save that style and then use it again on any text boxes we choose. This makes the text boxes consistent at least, and ensures that this consistency is achieved quickly.
Go back into design mode by clicking on the Design button. Right click on any control in the row of controls and click on Named style, click on Create style. In the Create Named Style form that pops up, you are going to specify how you want a control to appear. You will apply it other controls, perhaps on other forms and other applications. You will save a lot of time in the process. Lets start.
In the first field: the Style name field, give it a name basicControl. In the Description field type some descriptive text ie Basic control appearance, then click OK. Now in the list of Style names, basicControl will have appeared and it should be highlighted. Click on the Manage Stylesbutton, you are going to specify how the basicControl type of control will appear. Again basicControl should be highlighted, click on the Edit button to edit it. The Define Style form appears and the selected tab will be Font, on the far left. The Font tab controls how the text of the control appears change the colour to something dark, but not black, change the font-name if you wish along with the size. You cannot do any harm. Now click on the Lines & Colours tab. On this tab we will determine how the rectangular box that wraps around the field will appear. Try changing the fill colour to something light, but not white. Change the Frame to something dotted by selecting the down pointing arrow. And you might want to change the border colour to say orange. Now click on the Label tab to change the text that appears adjacent to the text box. Lets change the Label Text Colour to something like dark orange. You might also click on the last tab the Background tab to change the background colour of the form. Lets set this to pale cream colour. Click on the OK button, then click on Done. Shut down the Properties for: box by clicking on the little X at the top right of the form. Now lets apply this styling information to the other controls on the form. Right click on any one of the old-style of controls and click on the Named Style menu option. You will be presented with the Properties for: form and you should select basicControl as the style you want to apply to the currently selected control. Now click on each of the rest of the controls and click on basicControl as the style of choice. Click on Browse to see how the new form looks. You might want to leave the control on the far right as it is. It is a read-only control that you will not interact with, and you might want it to look different. Your database form might now look something like Figure 13 which features labels incorporated into the field boxes.
There are countless other ways you might want to style this form. The next figure Figure 14,  shows another possibility.
Remember that when you design a form, it needs to be clearly visible in a range of working environments and lighting, by a range of people, perhaps with eyesight that is inferior to yours. For example, you might want to make that text larger, and ensure the contrast between text and its background is marked.
Previous Next